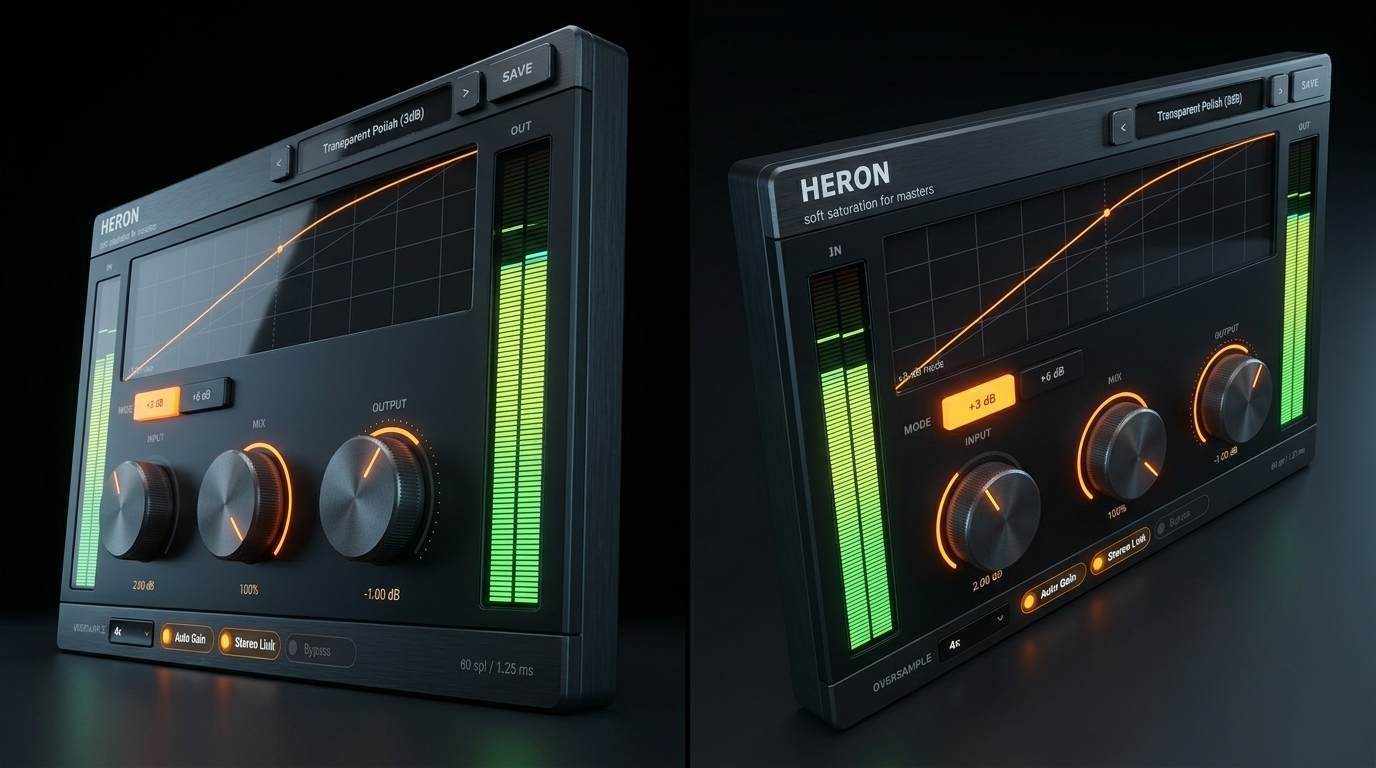
Interface Overview
Transfer Curve Display
The large graph in the center of the plugin is the most important visual in Heron. It plots input level (x-axis) against output level (y-axis) for the current saturation mode. A perfectly straight diagonal line would mean no processing — the curve bends at the top to show exactly where and how hard Heron is shaping your signal.
A small orange activity indicator moves along the curve in real time, showing the instantaneous level of the audio passing through. This tells you at a glance whether you are barely touching the saturation zone, sitting right in the sweet spot, or pushing into heavy clipping.

Input & Output Level Meters
Vertical level meters flank the transfer curve — Input on the left and Output on the right. Use the Input meter to gauge how hard you are driving the plugin before saturation. The Output meter confirms the final level after the Output Gain trim is applied. Both meters display peak hold so momentary transients are easy to catch.
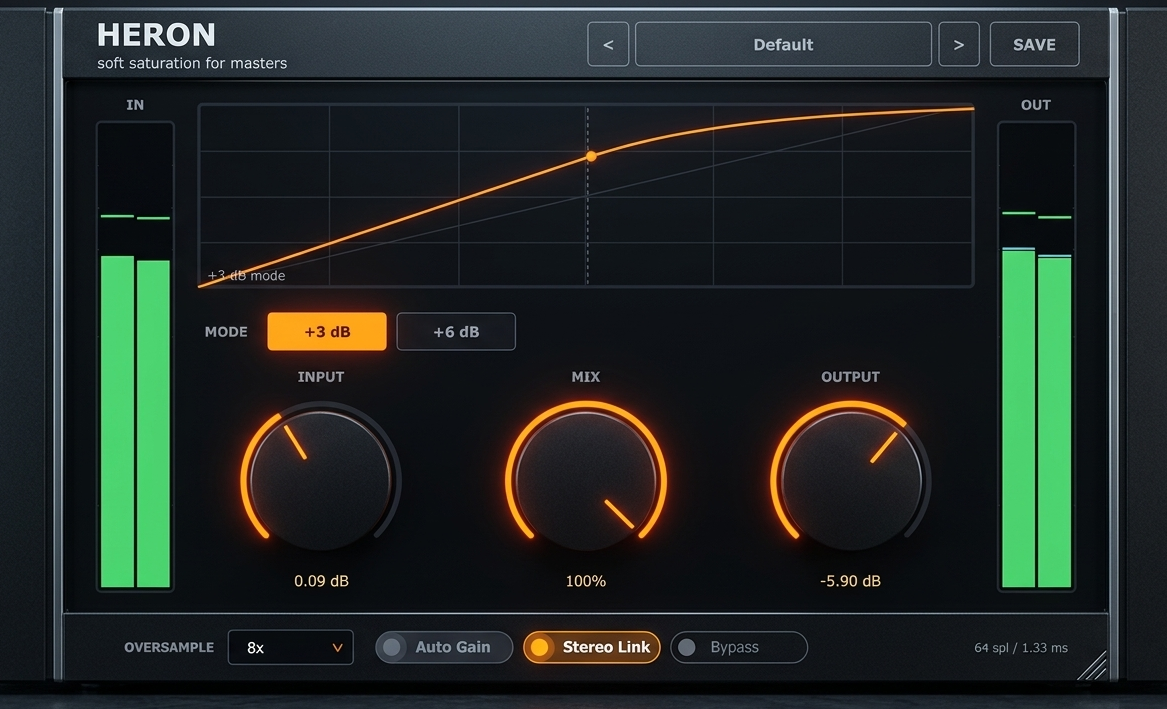
Mode & Core Controls
The controls arranged around the transfer curve give you precise control over how much saturation is applied and how the output is managed.
Toggles & Oversampling
Three toggle switches and an oversampling dropdown round out the control set.
Preset Bar
The preset bar at the top of the plugin contains left/right arrow buttons for stepping through presets, a display showing the current preset name, and a Save button. Factory presets are built into the plugin. Your own presets are saved as .heronpreset files in ~/Documents/Heron/Presets/ and appear automatically in the browser on next launch.
Reading the Transfer Curve
Three Zones on the Curve
Think of the transfer curve as having three behavioral zones from left to right:
Using the Activity Indicator
The orange dot traces along the curve in real time with your audio's instantaneous level. Raise Input Gain until the dot moves into the sweet spot bend — then listen. If the dot is consistently slamming the flat top of the curve you are overdriving the plugin. Back off Input Gain or reduce the source level feeding Heron.
For dynamic material like full mixes, the dot will dance across a range of the curve. That range tells you the effective working window of your saturation. If it never reaches the bend, add gain. If it never leaves the flat zone, reduce it.
How the Curve Changes with Mode
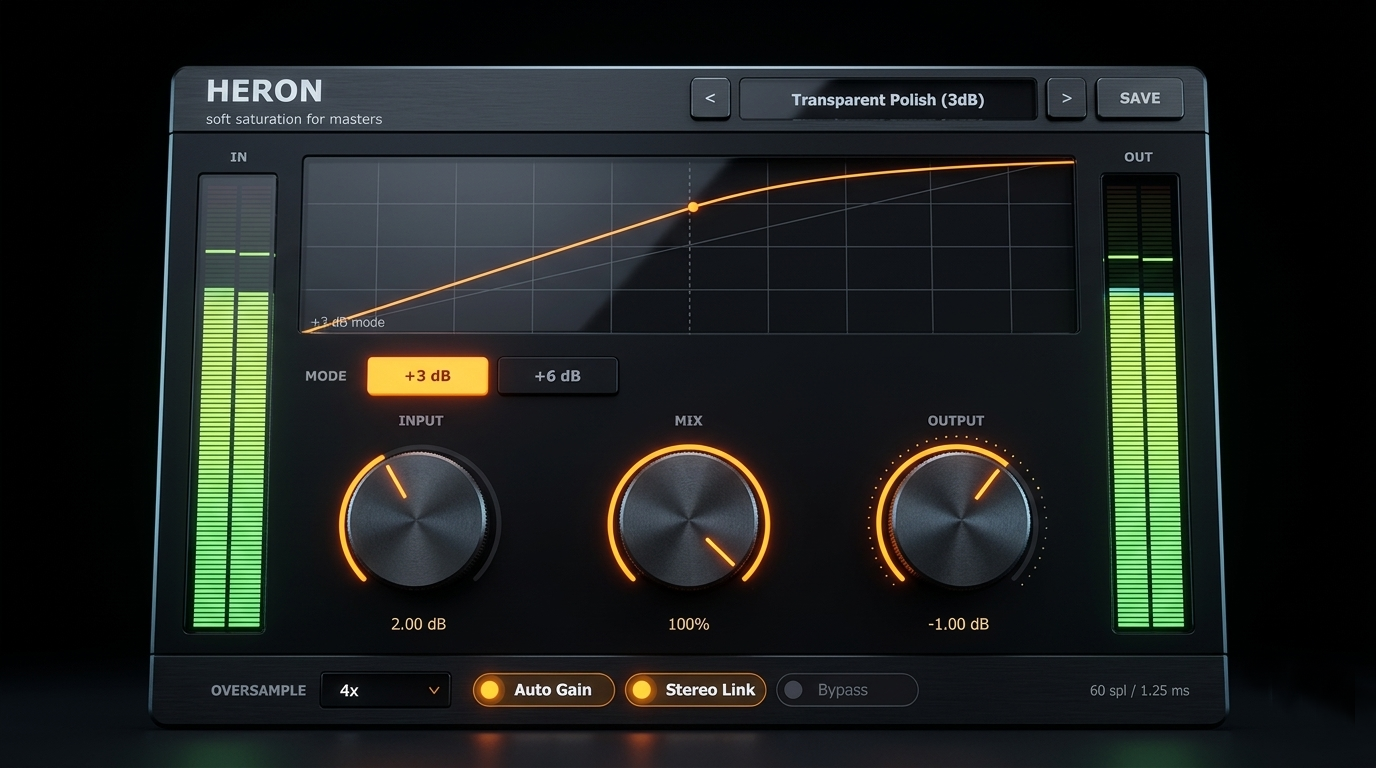
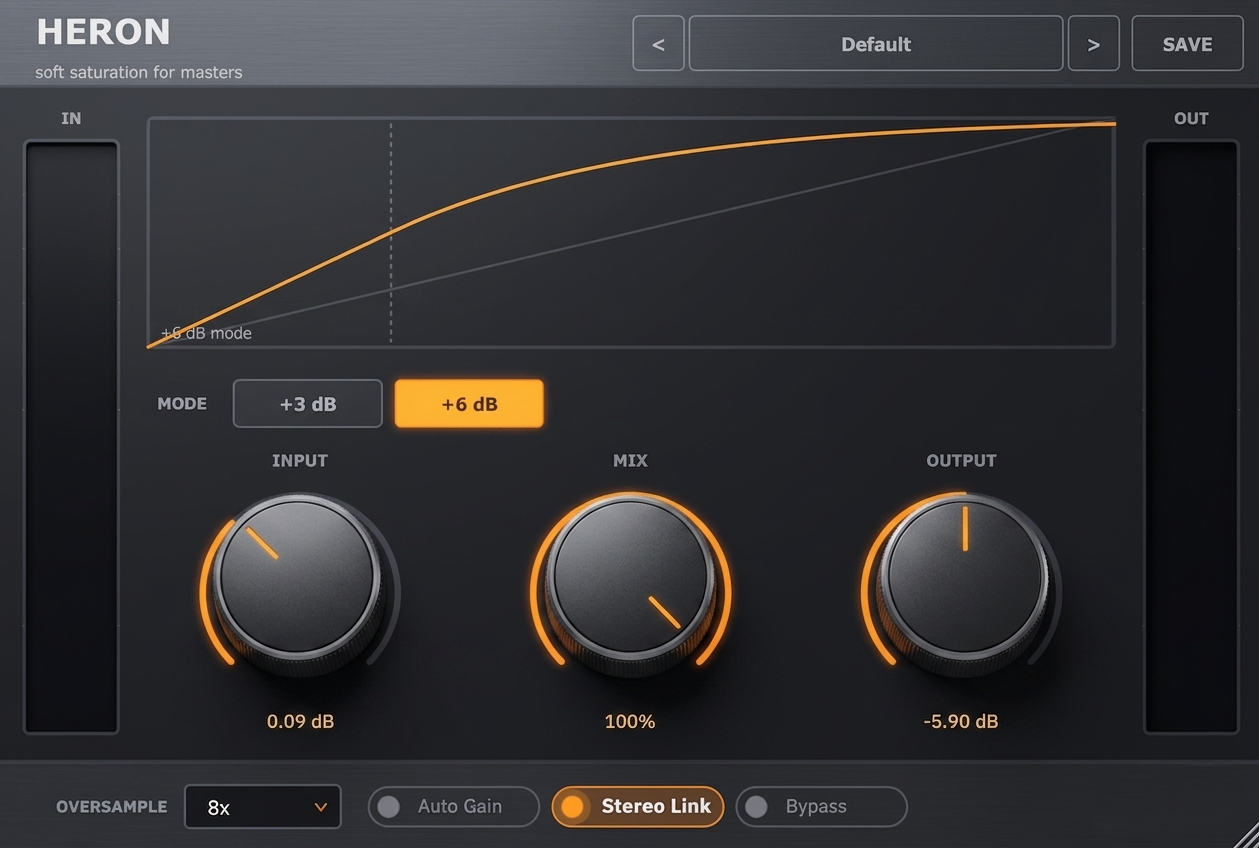
Switch between 3 dB and 6 dB mode and watch the curve reshape itself. In 3 dB mode the bend is shallower and starts closer to 0 dBFS, so only the loudest peaks get shaped. In 6 dB mode the threshold drops to −12 dBFS, meaning the curve starts bending earlier — more of your signal is colored, and the effect is more audible at the same Input Gain setting.
Best Use Cases
Master Bus Warmth & Soft Limiting
Place Heron last (or second to last before a true limiter) on your master bus. Enable Auto Gain and Stereo Link. Select 3 dB mode. Raise Input Gain slowly — use the curve display to find the point where the activity dot just kisses the bend on the loudest sections. This shaves off harsh transient peaks and adds a touch of glue without audible pumping or coloration.
For mastering quality output, set Oversample to 4x or 8x. The added latency is compensated by your DAW and the aliasing reduction is significant at this stage of the chain.
Drum Bus & Mix Bus Glue
On a drum bus or submix, try 6 dB mode with a moderate Input Gain so the activity dot settles in the sweet-spot zone during louder hits. The polynomial waveshaper adds even harmonics to the transients, making kick and snare feel more "present" in the mix without additional EQ.
Use the Mix knob at 40–70% to preserve the natural punch of the drums while still getting the cohesive, glued sound. This parallel saturation approach means you get the warmth without smearing the attack.

Parallel Saturation on Vocals or Guitars
On individual tracks, Heron excels as a parallel processor. Set Mix to 20–40% and push Input Gain into the 6 dB mode sweet spot. The activity dot should be moving dynamically — staying in the warm zone on loud notes and retreating toward gentle on quiet ones. This breathing behavior adds life and harmonic richness without making quiet passages sound processed.
For vocals, keep Stereo Link on even on a mono source — it has no negative effect and avoids any accidental mono/stereo mode mismatch if the track gets doubled or widened later.
A/B Comparing with Auto Gain & Bypass
The single most important habit when using any saturation plugin: always A/B at matched loudness. Enable Auto Gain so Heron compensates its own output as you adjust drive. Then use the built-in Bypass toggle (not your DAW's plugin bypass) to flip instantly between processed and dry. Because both states share the same latency compensation state, tracks stay in sync during the comparison.
If processed sounds better even at equal loudness, the saturation is doing real work. If it sounds better only when louder, reduce Input Gain — you were just adding volume, not warmth.